
Dreamer's KlubHouse would like to welcome our visitors to our Blog Room. Today I am joining Crafty Collaborations for their Crafty Challenge Blog Hop! It is my 1st hop in many years. Almost 10!
This is a group of Stampers from around the world that join together to bring you fabulous cards and projects. I am so happy to be joining them!

Today's challenge is a sketch. I love the way sketches stretch my imagination. They make me grow as a card maker. Here is the sketch we were given for this event. It gives us a great chance for interpretation. I stayed fairly close to the original idea, which is funny to me. . . I don't follow rules very closely! Colors listed are the ones I chose, but be rebellious and use your own!
Here is my recipe: 8 1/2" x 5 1/2" , scored at 4 1/4" Calypso Coral Cardstock 4 1/8" x 5 3/8" Soft Suede Cardstock 4" x 5 1/4" True Love Designer Series Paper 5 1/4" x 4" Basic White Cardstock 2" x3" Basic White Cardstock 1"x1 1/2" Calypso Coral Cardstock
Embellishments: Inks:
8" Faux Suede Trim Calypso Coral
Pearl Basic Jewels Bumblebee
Pear Pizzazz
Tools:
Always In My Heart Stamp Set
Layering Ovals Dies
Ornate Frames
Water Painters
Paper Trimmer
Bone Folder
Paper Snips
Take Your Pick Tool
Mini Dimensionals
Multipurpose Liquid Glue
Tear & Tape Adhesive
Clear Block "D"
- Tamp Bumblebee Ink onto Clear Block. Using Water Painter, paint onto inside of roses. I basically painting everything that had the shade marks. I follow with the Calypso Coral to fill in the tips of the roses. The leaves were filled in, then I went back with s dryer brush and deepened the center and the ridges. Set aside and let dry. Paint one small rosebud and fussy cut with your snips for embellishment. After drying, you may need to smooth out paper. The water will make it wrinkle as bit.

- Stamp Sentiment onto Basic White piece and Cut with Oval Die.
- Cut small tag from Calypso Coral using the Ornate Frames.
- Cut 1 1/4" piece of ribbon and set aside.
- Back the long piece of ribbon with Tear & Tape and adhere to lower piece of DSP. Adhere this piece to Soft Suede mat. Now adhere it to card base.
- Add Basic White cardstock to Inside and stamp sentiment of your choice.
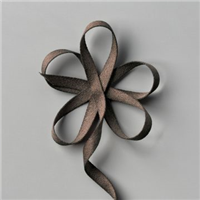
- Embellish card front as shone in pictures.


And there you have it! I would say it took me about 20 minutes to paint the front, but the rest goes together in a flash! I hope you enjoyed my card and tutorial. Please leave a comment. I will have a random drawing and the winner will receive one of my cards with the tutorial!
I am Dreamin' of a successful hop....You keep Dreamin' too!
Pammie Kay
Independent Stampin' Up! Demonstrator
Now...rush off to see the rest of the hop!
Visit my Friends
Link List
Shopping list: I would love to be your demonstrator, if you don't already have one. Click any of the products below to be mysteriously transported to my store! My Host Code for February is 7UPU79YW


Beautiful card! I love the colors you chose.
ReplyDeleteThank you. I wanted it to be similar to a Peace Rose!
ReplyDeleteNice coloring!
ReplyDeleteBeautiful card, I love the colours you have chosen x
ReplyDeleteBeautiful card! I love the color combo. I will definitely try it.
ReplyDeleteAdditional Heater and Thermometer Available: If the test is delayed, you don’t have to worry because Test Clear provides an additional heater at the time of purchase. That will ensure that your synthetic urine remains intact and in its original composition until the test is over. Also, at the time of purchase, you can add a digital thermometer to your package, which will give you a wider range of temperature. Also, it is more accurate than a temperature strip. ⇒ Click Here to Visit the Official Website of Test Clear for the Best Discount <img class="size-full wp-image-469119 aligncenter" src="https://www.laweekly.com/wp-content/uploads/2021/06/Screen-Shot-2021-06-01-at-1.28.39-PM.png" alt="" width="1250" height="816" srcset="https://www.laweekly.com/wp-content/uploads/2021/06/Screen-Shot-2021-06-01-at-1. She urinated thrice. [Interestingly, she noted her pee had the color of highlighter ink.]She then went in for the test and passed with flying colors. However, the color of the urine was alarming but was likely due to artificial coloring in the drink.The Detoxify XXtra Clean Herbal Cleanse was the second drink Lucy tried. She drank this tropical-flavored juice and then refilled it with water. Following the instructions, she then went ahead to take the test.Although she was smoking weed during her detox, she was able to pass the test undetected.
ReplyDelete