I am hopping today with my fellow demonstrators from around the globe at Ink Stamp Share. I love to do blog hops because it gives you, my readers, so many examples of the same theme. Today we are doing 3D projects. I am sure that most of them will be great for the upcoming gift giving season! Mark this hop for later use.
I learned to make this Pinwheel Tower at one of my All Day Crops from my cousin Linda. She is also a Stampin' Up! Demonstrator. I love that it is three dimensional, but folds flat to mail. I am going to try to explain how I did it. But there are TONS of videos that may explain it better. Let's have a try! (*I made mine larger to accommodate my salt shaker that i put my pinwheels into. These instructions are for this larger size!)
- Cut cardstock 6 1/2' x 4 1/4" Score at 1 1/2", 3", 4 1/2", 6"
- Fold and burnish each score line. Put Tear and Tape on the 1/2" piece, and fold opposite end down to make the square peg for center.
- Cut 4 pieces of cardstock 2 3/4" x 4 1/4".
- Decorate as you wish. My mats were cut at 2 1/2' x 4". The side pieces were cut 1" x 4".
- Glue to sides of tower.
- I used 1 1/2" squares to make my pinwheels and taped them to some beading wire. I poked them into the lid of a salt shaker and twisted the stems together to get the to stand where I wanted them to be!
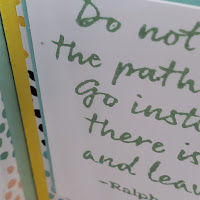
I used the newest Hostess DSP pack for my card. There are so many wonderful patterns in it. Ask me how you can get yours in the comments!
It is a simple process. The only thinking part of it was to put the correct "side pieces" on the back of the correct flap! I MAY have had to redo one! I suggest not using as many popped up pieces as it does not fold flat! I am not mailing mine so it isn't a problem. The pinwheels were added to just give it a touch of whimsey, but are not necessary if you just want the card.
I hope you enjoyed my project. If so, please leave a comment below. Now it is time to hop to the next blog for more great inspiration.
I'm Dreamin' of more crafty times with you all....You keep Dreamin' too!
Pammie Kay
Independent Stampin' Up! Demonstrator
My website https://pamelafunk.stampinup.net
my Facebook page https://www.facebook.com/klubhouseretreat


.png)


What a great idea esp. for a youngster. Thanks for sharing
ReplyDeleteThis is fabulous! I've never seen something like this before! Very Creative and Fun xx
ReplyDeleteGreat idea, never seen this before x
ReplyDeleteWhat a great project Pam, I don't think I have seen this design before, love it x
ReplyDeleteI am in love with this card! I think my mind has been blown with all the possibilities! Thank you!
ReplyDelete