Showing posts with label Stampin' Up!. Show all posts

Saturday, February 26, 2022

Dahlia Days & Flowering Fields


   Good morning Dreamers! And new friends! Have you ever have Designer Series Paper that was just too pretty to cut? I have to admit, I have tons of it!  Stampin' Up! keeps giving us more and more beautiful papers! They need to stop, LOL!  

    Today is my first blog Hop with Jo Blackman and the demonstrators at INK STAMP SHARE. I am delighted to work with such  talented ladies. We started with a sketch and was set loose to let our creativity soar.

So I decided...this calls for some of that pretty paper! 

It was scary. 
                    My hands were sweating.
                                                   And then...
I CUT IT!
 And my results are very satisfying. so let's get a look.

The paper I used was taken from the Flowering Fields DSP pack. It is designed to go with the Flowering Tulips Bundle, which I didn't get. (I only have so much creative money to spend!) It is on the back side of a page filled with tulip fields. I have always wanted to go to Holland and see this sight. Some day!
 My stamp bundle I chose was the Dahlia Days.  First off, I cut a piece of the DSP and backed it with Adhesive Sheets.. There was no way I wanted to try to glue all those little lines with glue. Next I took the large die and cut it out. 

For my mat I used a piece of Evening Evergreen cut 3 3/4" x 5". On the long side, cut 1 3/8" off each end. that will leave you with 2 1/4" left for the middle. On a card base of  Soft Succulent , glue these pieces down with 1/8" border all around. Tip: I glued both end pieces and then centered the large piece down. Worked better for me.
    I have loved the stamp that has the label with flower spray since I first saw it in the catalog. The hardest part of this card was figuring out what color to stamp it on! I tried picking out colors from the DSP. I tried Soft Succulent, Pool Party,&  Pear Pizzazz. Nope. I even embossed it in white on the Evening Evergreen. Big nope!! Then I got out the trusty Whisper White and Memento ink pad. I was a bit bright so i softened it with Pool Party applied with my  Blending Brush! Perfect! And here is a better picture of my finished card.
And now it is time to "hop on" to the next blog. Be sure to leave me a comment and let me know how you enjoyed it.


I'm Dreamin' of more Dahlia Days ahead...You keep Dreaming too!


Pammie Kay
Independent Stampin' Up! Demonstrator


Monday, April 26, 2021

Not so Simple Monday...Introducing Polished Pink

 I am so in love with the NEW 2021-2023 In-Colors.  Last week I focused on Pale Papaya, on my Simple Sunday Live and my Coffee & Cards. sorry I didn't get to the Blog again last week. So it is Saturday and I am typing this for Monday!  The only way to get things done. Don't you love to be able to schedule our social media?

    No need to put in the dimensions of yesterdays' card. I used a base of  Basic White cut at 5 1/2" x 8 1/2" nd scored at 41/4".  The mask I used was 2" wide!


  I kept my design basically the same as the original. I just stepped it up. Quite a bit, as a matter of fact!  Let me tell you how.

  • I masked off a 2" strip at the bottom. of a card base of Thick Basic White,  (See video for a how to)
  • Using Polished Pink Stampin' Pad &  Blending Brush, I softly started added colors around the edges. I worked my way slowly to the middle, pulling the ink into the middle. I love the "glow" this technique made.

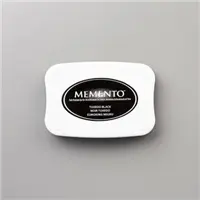
  • With Tuxedo Black Memento I stamped the flower stem from Color & Contour 3 times on Polished Pink Cardstock. I die cut them out using Scalloped Contours dies.
  • I glued these dies to the top section of the card, giving the illusion that they went under the white stripe!  The center die was popped up with Mini Stampin' Dimensionals
  • Also using Memento, I stamped the sentiment on a scrap of Basic White CS. The 2nd smallest rectangle die cut out a darling edge for the label.  I used the Mini Stampin' Dimensionals to give this a little punch and to create a bit of drama to the card! 

  • I felt the little "dots" on the the corners absolutely called for some bling, so I added an In-Color Jewel on each one.

    And here it is! My finished card!  See what I mean by the glow? It isn't a bright white any longer. These blender brushes may be my favorite new toy!!
Thanks for joining me!  There are several changes coming in the near future, so hang out and be a part of it!  I love Stampin' Up! so much! They always have the best products. 

so until we see each other again....
I'm Dreamin' of crops and retreats...You keep Dreamin' too!

Pammie Kay
Independent Stampin' Up! Demonstrator

Wednesday, March 10, 2021

Playing with Playful Alphabet


Welcome Dreamers! I have a horrid confession to make. We are all friends here, so I feel safe you won't chastise me too much or tell anyone...pinky swear? Good. The truth is . . .I don't know if I can write it on paper or not. Okay..deep breath! 

 THIS IS THE FIRST SCRAPBOOK LAYOUT I HAVE DONE SINCE I CLOSED THE STORE!


I know, I can't believe it either!  2014! I can't even remember the last layout I made, what paper did I use? No idea! You know I have been doing Blog Hops with Crafty Collaborations, a group Of Stampin' Up! Demos from around the world. My hope was to bring more people to my blog and then to my Face Book and ideally to become customer friends. But do you want to know what has really happened? I have gotten more creative and excited about my paper crafting! Really! Being surrounded by so many wonderful artists. Who wouldn't be inspired?   Enough words. .let's start the hop!


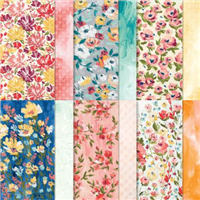
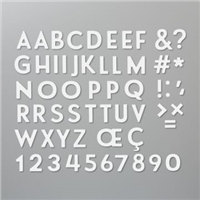
Confession #2...I did not have any 12 x 12 Stampin' Up!  paper, other than DSP. I know what will be on my next order, don't you?  I have lots of inventory from the store, so I grabbed a piece of smooth white cardstock. I knew I wanted to showcase the Fine Art Floral DSP and the Playful Alphabet dies. Spring colored cardstock was my next decision. Isn't it great that the coordinating colors are listed on the chipboard insert with every DSP packet? Made it so easy to pick the So Saffron, Pool Party and Flirty Flamingo. 

  • The background mat is in Old Olive, cut 9" x 8" centered on page.
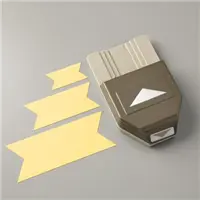
  • From the Fine Art Floral, I cut a piece 1" x 11" , punched the banner and adhered it in the middle.  The yellow piece on right is 2" x 9", punched with the Triple Banner Punch.  the final piece of DSP was roughly about 2" x 4". About 1 1/2" shows from under picture. 
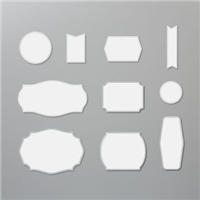
  • Banners were die cut with the banner die from Tasteful Textures.  The words were cut from the Playful Alphabets Die set.  I popped them up and adhered them above the Mossy Meadow Braided Linen Trim. 

  •    

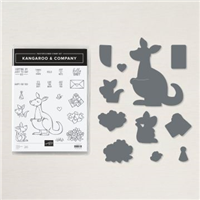
  • To "hold" the banners up, i stamped and die cut the little butterflies from the Kangaroo & Co set. A little splash of color brought them alive! The were also popped up for a bit more texture.
  • I stamped and die cut the bouquets from Kangaroo & Co set also. I painted them with the light colors that match the cardstock.  


  • My pictures are matted with the slightest hint of pool party.  
And There you have it! The beginning of hopefully many more layouts. I will add the 2nd page this week because I always do a double layout. My journaling will be on that page. I need to share my feelings of joy and relief to see bloom after the end of this long Covid-19 Winter.  The loss of 12 friends to this pandemic has left me seeking peace and joy where I can find it. I always find it in the God Winks of my Savior. 
     I hope my layout has brought you some joy in this dreary end of winter. I love to hear what you think, so please leave a comment.  And now it is off to visit another of my friends and discover what joy they have to share with you. 


I am Dreamin' of my next project...You keep Dreamin' too!

Pammie Kay
Independent Stampin' Up! Demonstrator

One of my favorite poems as a child & now an adult

I Wandered Lonely as a Cloud
By William Wordsworth

I wandered lonely as a cloud
That floats on high o'er vales and hills,
When all at once I saw a crowd,
A host, of golden daffodils;
Beside the lake, beneath the the trees,
Fluttering and dancing in the breeze.

Continuous as the stars that shine
And twinkle on the milky way,
They stretched in never-ending line
Along the margin of a bay;
Ten thousand saw I at a glance,
Tossing their heads in sprightly dance.

The waves beside them danced; but they
Out-did the sparkling waves in glee;
A poet could not but be gay,
In such a jocund company;
I  gazed--and gazed--but little thought
What wealth the show to me had brought.

For oft, when on my couch I lie
In vacant or in pensive mood,
They flash upon that inward eye
Which is the bliss of solitude;
And then my heart with pleasure fills, 
And dances with the daffodils. 


I have listed the products that I used. If you do not have a demonstrator, I would love to be yours. I am just beginning my journey in this business, and love to bring my passion and service to each and every one who joins me. Clicking on a picture will take you directly to my website and that product.  Thanks.


Tuesday, March 09, 2021

Funky Ribbon Organizers

 
Welcome Dreamers! I am here with another blog hop with the Crafter Collaborations group. We are a group of Stampin' Up! Demonstrators from around the world, all interested in sharing our passion for stamps and paper with you! 

The technique this month focuses on ribbons. Cards with ribbons, fun ideas with ribbons, etc. Well, I have a love/hate relationship with ribbons. Love to use them, hate to store them! So a trip to pinterest for ideas. This left me frustrated with the lack of project ideas out there. So I immediately got busy making one to fit my storage area.


This is  Before

And After

You can see why I needed help!  I had a specific space on this shelving that I store my stamp sets on. So the sized are what I needed. And I could make it from one piece of cardstock. You can very easily adjust a bit to fit your space. It holds a dozen ribbon rolls, which gets most of my current ribbons all together. I even use retired ribbons in my personal crafting, but not for classes. .I will need LOTS of holders to organize those!

 I am going to attempt to explain how to make this. Wish me luck! 

  • Cut cardstock 7 1/2" x 11". On long side score at 2" and 9". On short side score at 2" and 5 1/2" 
  •  Cut DSP: 1 3/4" x 6 3/4" (cut 2); and 1 3/4" x 3 1/4" (cut 2) Glue to center of 4 end flaps.


  •  Cut scrap 1' by 11". Score down middle (1/2") On this score line mark a dot 1/4" from left side. and then continue every half inch down the piece. The template makes this so much easier! Lay it on top of front edge piece, as in picture.

  •  I secured mine with washi tape, because it wanted to shift. Punch holes centering on marks and the score line, as shown. note that not all ribbons fir directly with the holes, because they are not a regulated size. I adjusted my ribbons to make it work. 
  •  Fold and burnish on score lines, On each short end cut on the vertical score line to meet the horizontal score line. The first picture above shows this clearly.
  • Put strips of Tear & Tape on one flap of each end. This will help keep it from flapping and ripping  when putting ribbon in.  The top photo shows a great view of this step. 
  • Now, flip your box over to the inside. Apply Tear & Tape on center flap as pictured above. Last step is to fold and assemble. Make sure your corners are square!  Or it will make you nuts forever!!

         My ribbon holders make me smile!  I made the one above with SAB for my Granddaughters collection of retired ribbons! She love to be in the studio. I love our Granny Apple Green cardstock which is my signature color in the KlubHouse Studio.  And I used up a favorite piece of retired DSP. You know you have some that you cherish. When my style changes, it will be easy to remake them and update my look!

    I get so involved with creating that things just pile up. Not anymore! I have at least controlled one area in my space. Thanks for taking time to read my blog. I hope you
    will try and make these simple Funky Ribbon Organizers. .If you have any questions, just leave them in the comments.                                                                                                                                                     Now on to the next blog. I am sure that they have amazing project to share with you!


Daily I am Dreamin' of an organized craft studio...You keep Dreamin' too!

Pammie Kay 
Independent Stampin' Up! Demonstrator


Sunday, February 28, 2021

A Birthday Roo!

 This week has gone so fast! I had lots of time the first part of the week to create, before we started having the Grandchildren before and after school. I worked on cards for a class and "jumped" at the chance to take part in another blog hop with Crafty Collaborations. What a privilege  to join with Stampin' Up! demonstrators around the world!  No more delays...let's "hop" to it!
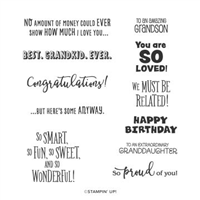

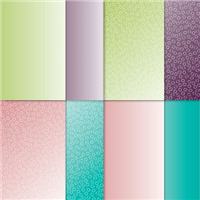
  We were given great leeway with this hop...to share a project, any project!  Believe it or not, that was a challenge in itself!  I needed some guidance. But it didn't take too much thinking to realize I wanted to use Kangaroo & Co from the Jan-June Mini Catalog! And  Oh So Ombre DSP that I got free from Sale-A-Bration makes this set hop off the card into your heart! 


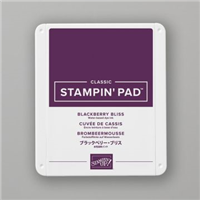
     I began with a base card of Blackberry Bliss cut at 8 1/2" x 11". I scored it at 2 1/8" and at 4 1/4", on the long side. Be sure to burnish the folds very crisply. A piece of the DSP cut at 1 7/8" x 5 1/4" was glued to the front flap and the inside piece measures 4" x 5 1/4". 
   I stamped Momma & Baby Roo and colored them with Stampin' Blends. I fussy cut them both, even though I do have the dies that come with this set The white border was a little too distracting on the dark background.   The diamonds were cut 1 1/4" square. Stamping and coloring on the bottom and top blocks left nothing to do but glue it together.  Little Roo was pop upped using dimensionals. The Happy Birthday sentiment came from the A Grand Kid set also in the current mini catalog. 
    I love the way our many color products work together. And I love that Stampin' Up! has given us the opportunity to share it with you all.   Be sure to grab some free SAB Rewards...today is the last day!
 I hope you enjoyed my card and the rest of the projects these talented Demos have made for you. 


What'Sup Wednesday

Good Morning Dreamers!  Welcome to the new What'Sup? Wednesday Blog!  There is so much going on at Stampin' Up!©️ this week that a F...